On the newer devices the overflow button is located on the right of the menu-toolbar
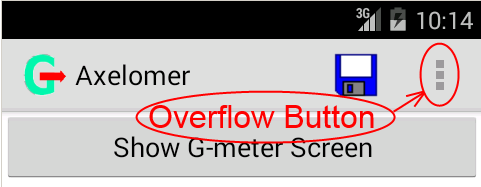
while on the old android devices it is a designated "menu" button of the device itself.
The acceleration is displayed in terms of “G” units, i.e. relative to free-fall gravity acceleration which is approximately 9.8 m/sec2. For example if the application displays right acceleration of ”0.5” while the car is in a right turn on a level road then it means that the side-way force is equal to the 0.5 weight of the car.
It is important to know lateral acceleration and hence lateral force on a vehicle while racing because its maximum value is determined by the capability of a car and its tires (and of course also depends on the road/track material). The best performance is achieved while having highest lateral acceleration just before the tires begin to skid (except for “drift-driving” style). Max value achieved on a standard tight round track is typically quoted as a “skid-pad test”.
Note: a “banked road” turn helps by reducing side-way acceleration. Consequently, turning on the banked turn with the same speed and rate of turn will result in smaller side-way acceleration compared to a level road. In fact, as you know, for every banked turn there is a “sweet-spot” speed at which the side-way acceleration is zero, i.e. no lateral force. This would give you the safest speed to ride the turn while driving a high center of gravity vehicle such as an SUV on a freeway to freeway junctions.
On a similar note, if while driving straight on a level road you enter a section with a bank, then you'd experience a side-way force and hence the unit would display a side-way (i.e. lateral) acceleration.
Backward (negative axial) acceleration (which is often called deceleration) is a characteristic of braking capability of the car. For example: what is the maximum deceleration achieved when the antilock braking system is used vs when it is not used (antilock braking system is improving directional stability while braking, however at the expense of braking performance).
A highly experienced race driver can estimate the right amount of the acceleration with his/her body very well and knows how much a car can handle for every specific corner and situation. This program will help to improve the feel for acceleration for drivers who are less than experts and improve the skill.
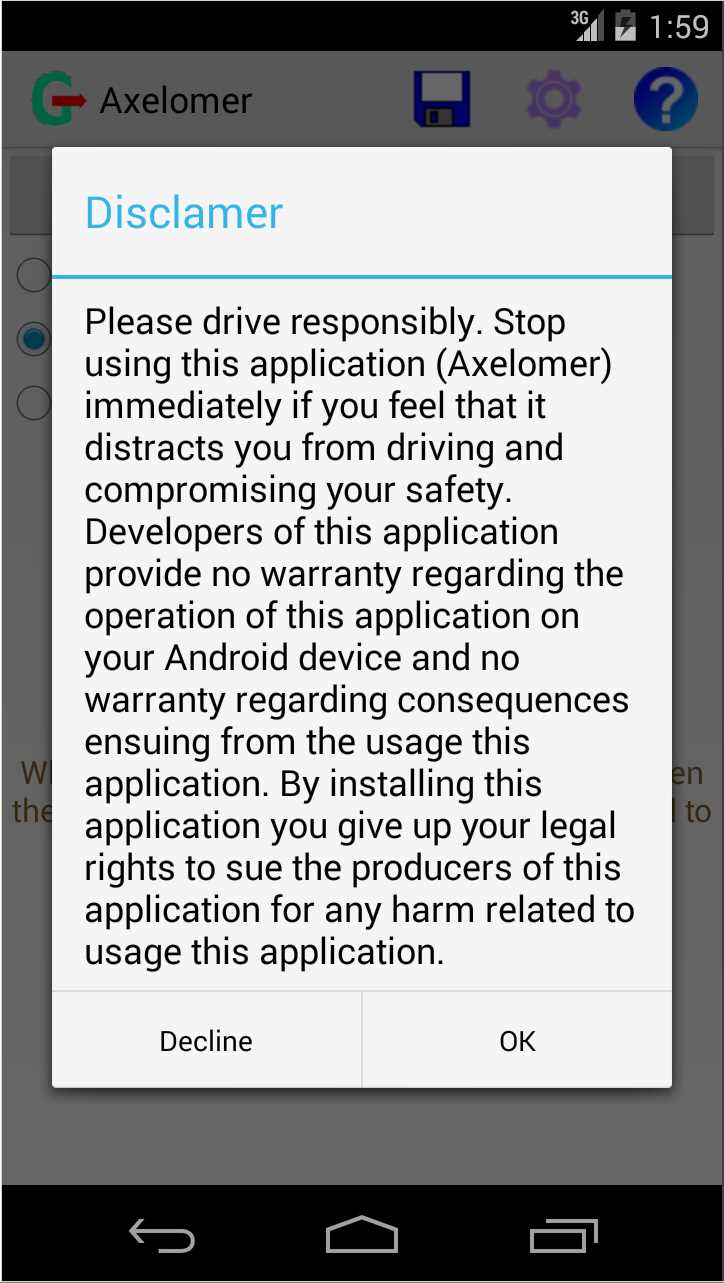 When you start the application for the first time it will give you a "Disclaimer" dialog view with "agree" and "disagree" buttons.
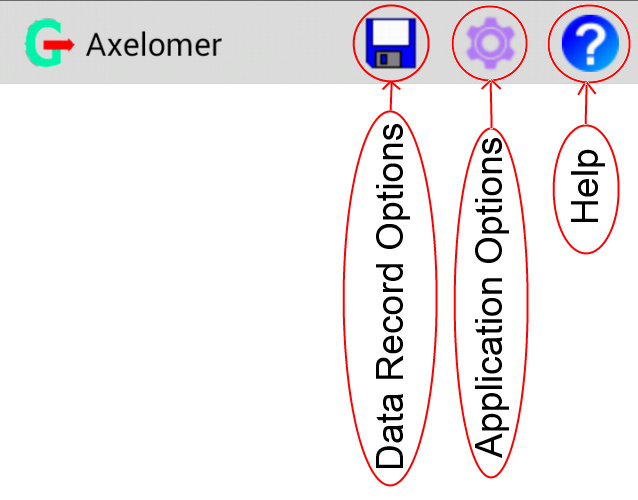 ⇚ On top of the Device Position screen/view you have the menu-toolbar (shown on the picture to the left).
On devices with narrow screens the buttons which didn't fit in the menu-toolbar are accessible via the overflow button.
On the newer devices the overflow button is located on the right of the menu-toolbar
while on the old android devices it is a designated "menu" button of the device itself.
Pressing the button on the menu-toolbar will switch to the corresponding screen. Press back-button to navigate to the previous screen.
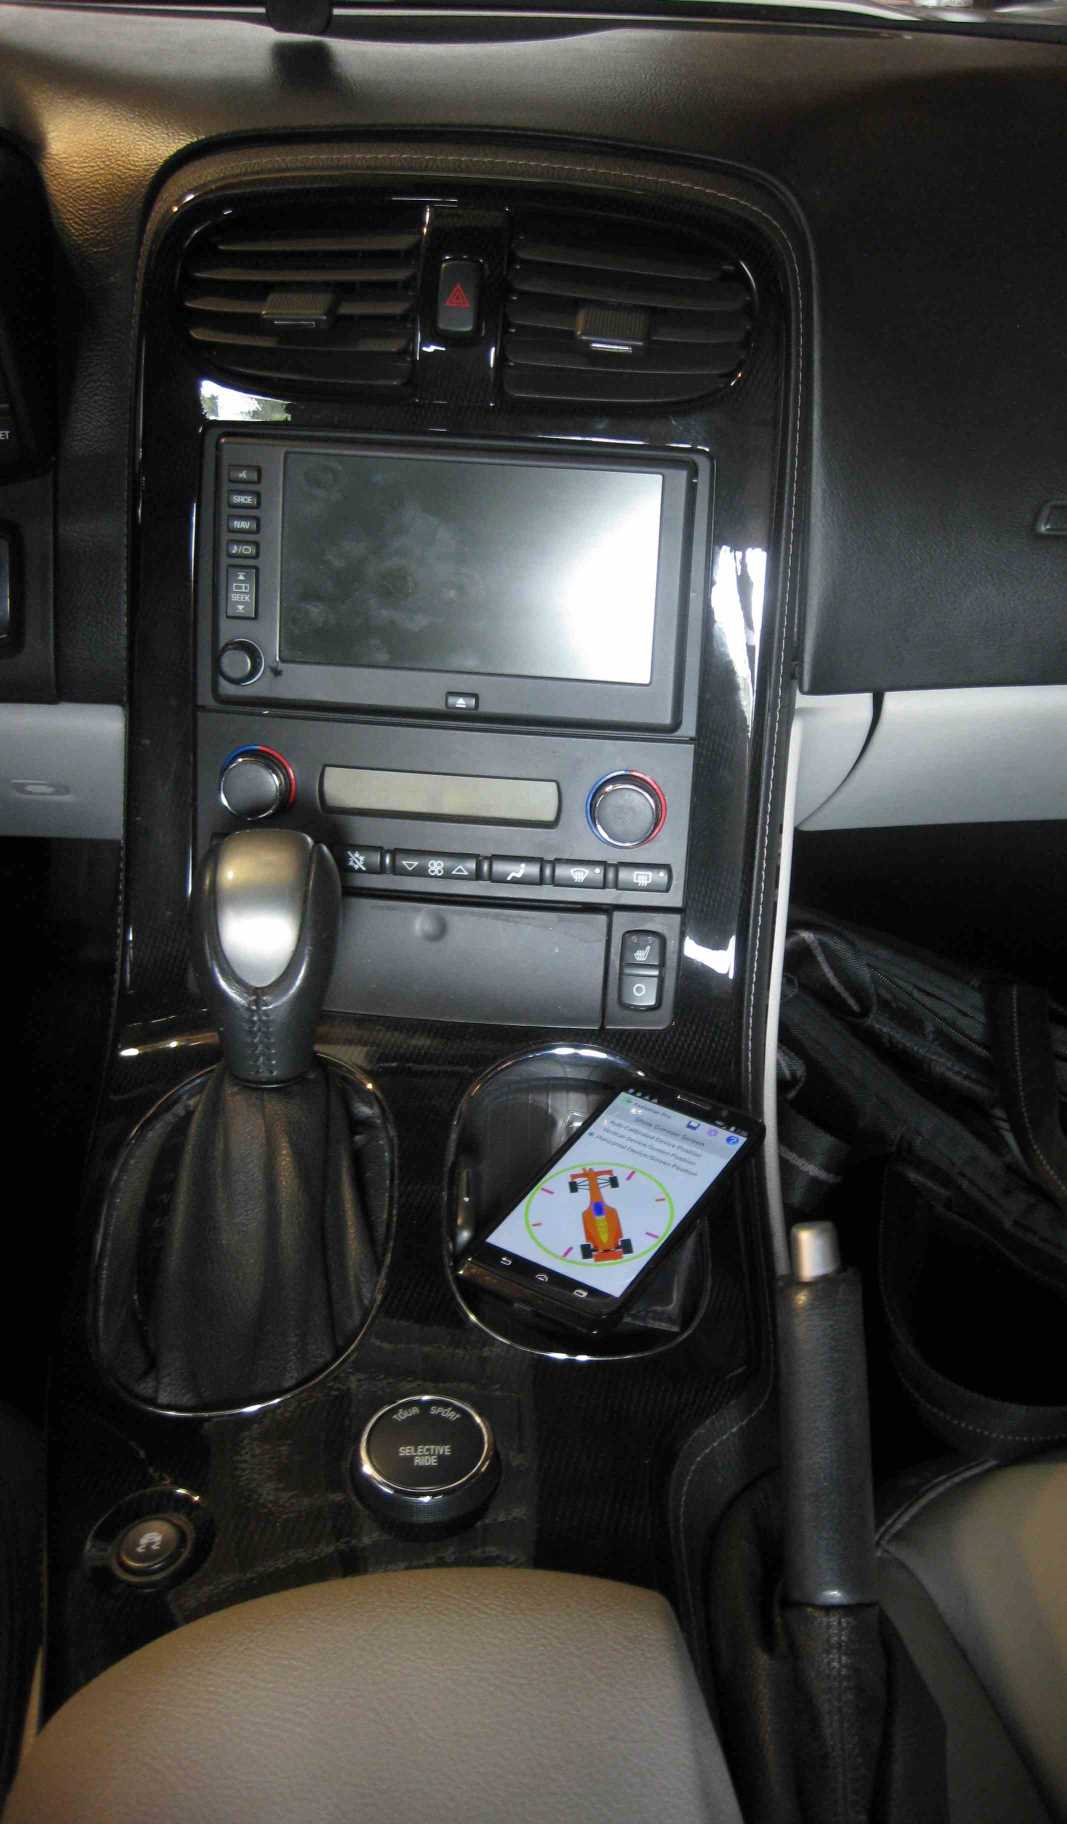
Choose mounting option, then mount/place the android device (if not yet done so), and after the device is in position, only then press the button “Show G-meter Screen” to switch to the “Display G” screen.
Note that it is very important to mount the android device firmly to the body of the car. When the car body vibrates from the engine working and even more so from moving, the vibration translates to the Android device. If the device mounting is loose, flimsy and springy, then it greatly amplifies it vibration. The vibration introduces a lot of noise in the acceleration measurement, thus spoiling the results.
The "Automatic" device mounting orientation detection is an experimental feature.
It may take longer to detect/calibrate (longer time period after the action screen/view is displayed and before the acceleration readings become available).
For example it usually takes less than 3 seconds to calibrate in the "Vertical" or "Horizontal" mounting mode, while may take up to half a minute or more to detect/calibrate in the "Automatic" mode.
Also the precision of acceleration measurements in the "Automatic" orientation detection mode may be less than in the manual/fixed modes (vertical or horizontal).
The more you accelerate and brake while moving in a straight line, the faster the detection is performed in the "Automatic" mode - typically one good braking should be enough.
The "Automatic" orientation detection mode rely on the proper operation of the compass sensor of your android device, thus if the compass itself is malfunctioning or not calibrated,
then the automatic device orientation detection may produce incorrect results.
If compass calibration is compromised then the application will give you a warning dialog box prompting to calibrate the compass by rotating the android device around all its 3 axes.
Note that most of the time problems with compass calibration are due to placing it near strong magnets, or on large chunks of iron, or close to wires carrying large currents.
Unfortunately a car has a lot of those.
If you experience repeated compass calibration warnings then either try to move your Android devise in different place or use Horizontal or Vertical mounting options which do not use compass.
The "Automatic" mode has one advantage over "Vertical" and "Horizontal" modes: there is no limit on the orientation you affix your Android device to the car, while "Vertical" mode requires near vertical device mounting with back of device pointing exactly in the forward direction of the car, and "Horizontal" mode requires horizontal device position.
The examples of proper Device Mounting Position and corresponding screens are shown below. Click on the pictures to enlarge.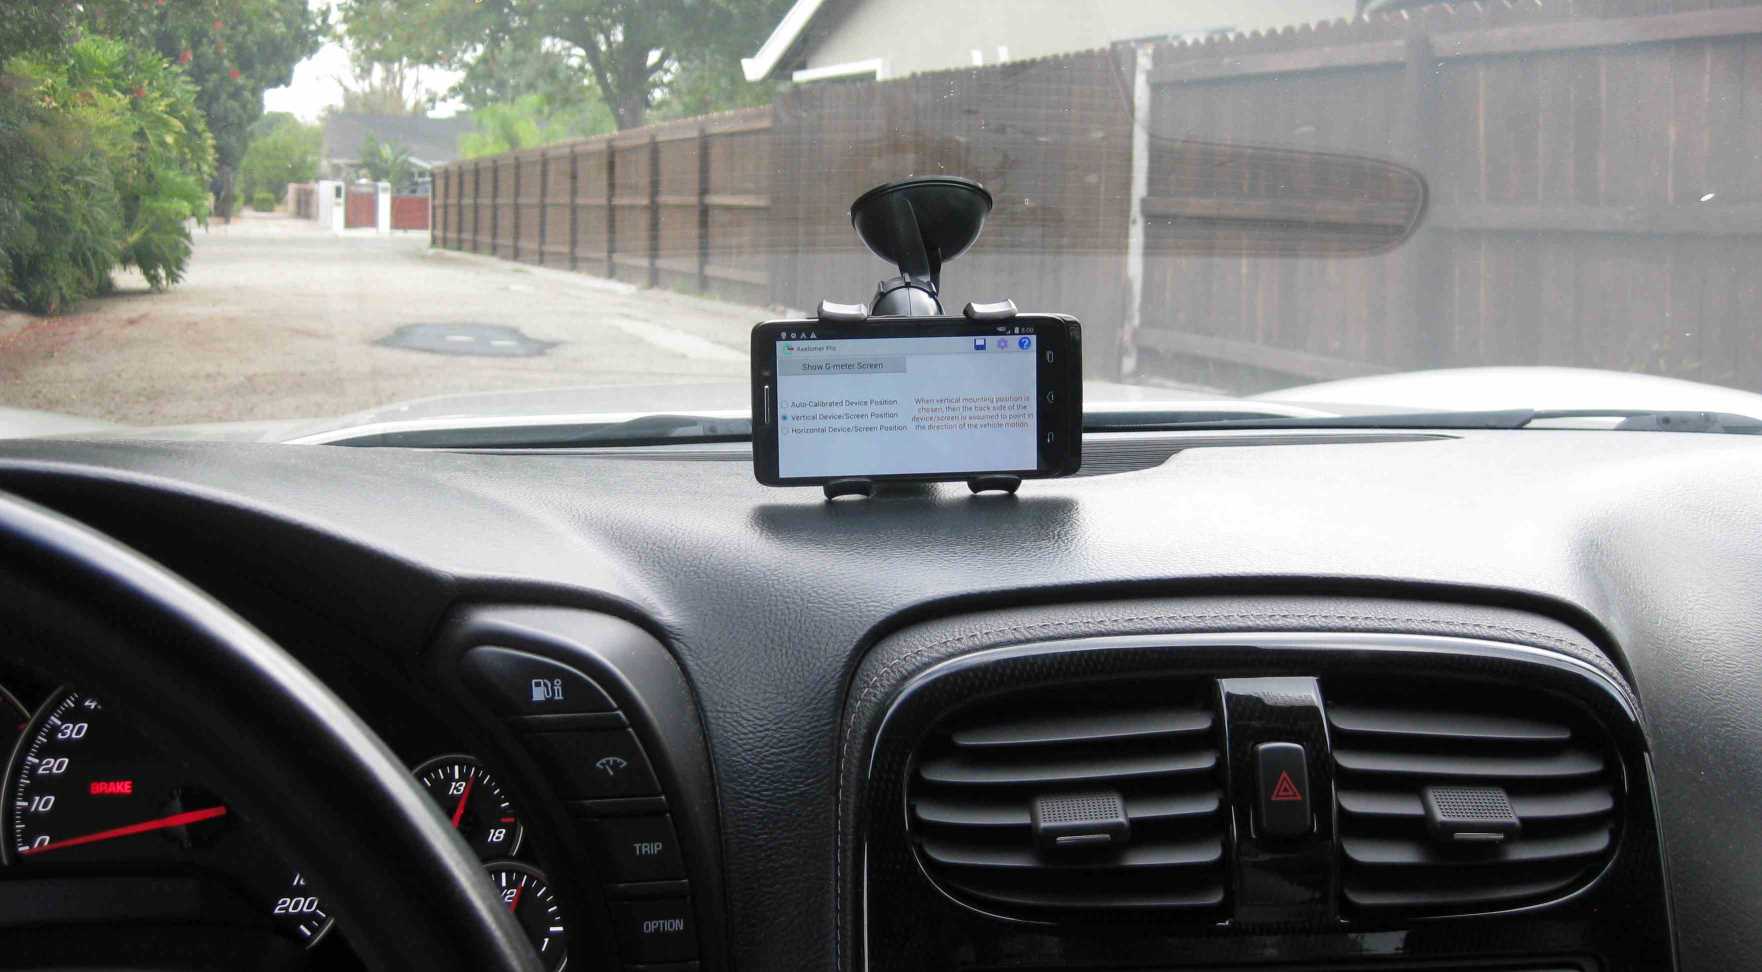 |
Vertical: Screen is easy to see while driving. The device is positioned so its back is looking square in the forward direction. Note that the mounting is attached to the wind-shield, but also rests on the dash-board to increase stability. |
 |
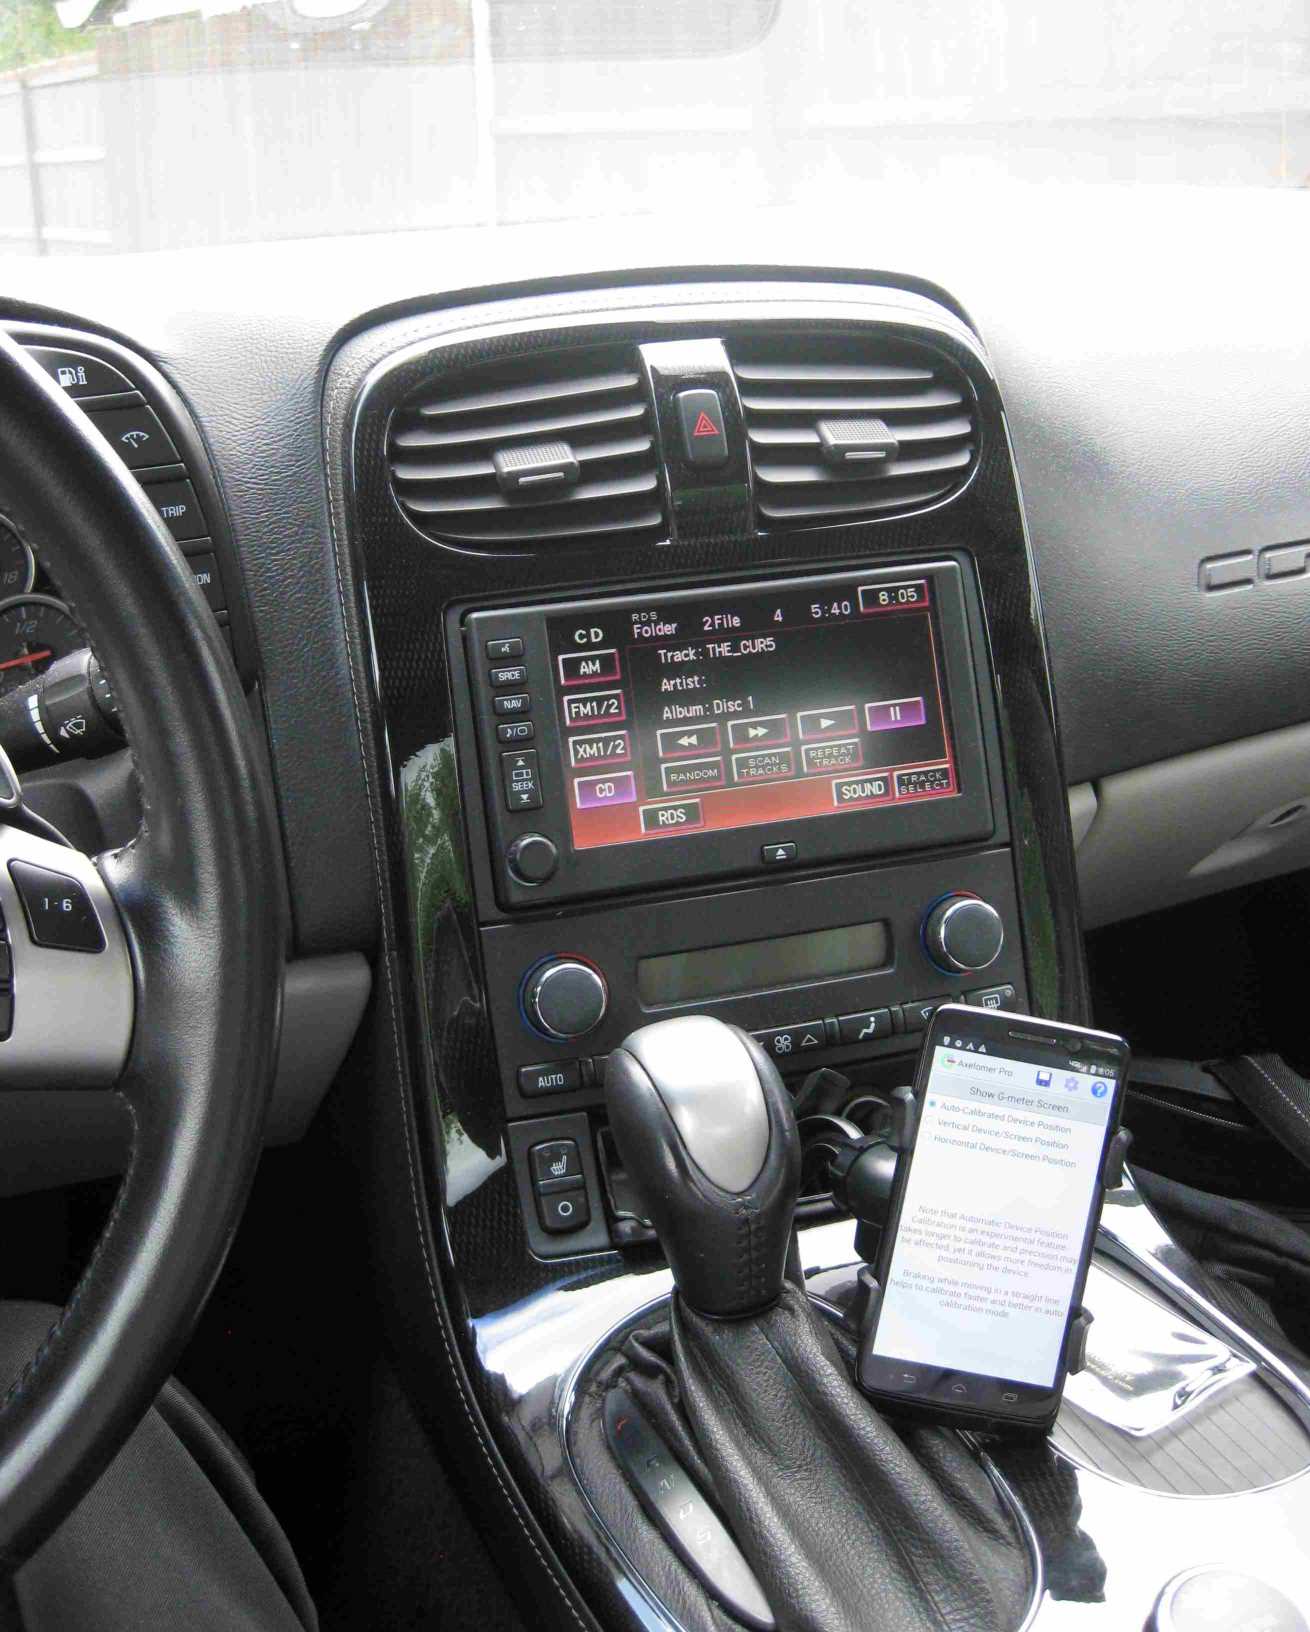
Horizontal: Note that you have to point the miniature car on the setup screen in the forward direction of your car (as shown in the example). |
 |
Automatic: Mount any way you like as long as it is firmly attached to prevent vibration and shaking. |
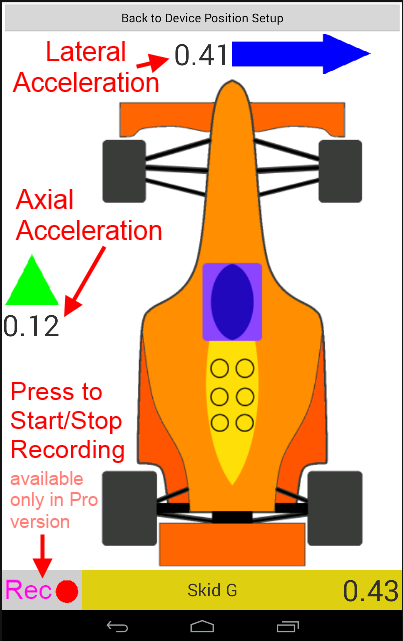 On the right you can see a picture showing a sample action screen/view. ⇛
Press back button or “Back to Device Position Setup” button to return to the “Device Position Setup” screen.
When you use "Vertical" or "Horizontal" device position/orientation modes, it takes only a few seconds after you switch to the Action screen to start displaying the car acceleration.
Remember that in those positioning modes if the actual device position is sufficiently far from being placed/attached vertically or horizontally respectively,
then the application would display a warning message "Device Position does Not Conform to Setup" until the device is properly positioned.
In "Automatic" position detection mode, as explained in the previous section,
it may take much longer after switching to Action screen to detect device position/orientation before you can see the acceleration data displayed.
In this mode a warning message "Detecting Android Orientation Relative to Car, please wait" is displayed until orientation is detected.
The details of how to operate the data recorder are given in the "Data Recording Operation" section of this manual below. The basic/free version of this application does not have the data recording capability and hence the "Rec"button is not shown in the basic/free version.
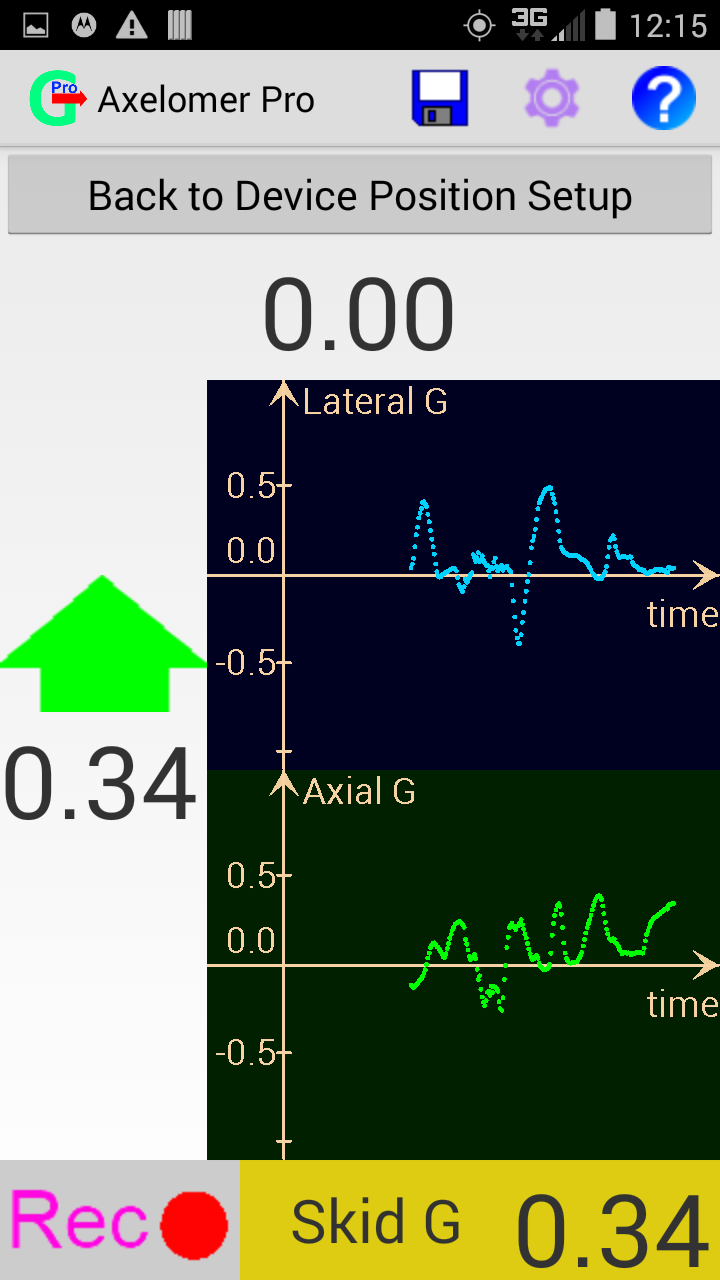 Another feature available in the "Pro" version is plotting of recent acceleration, where you can see about a half minute of the recent acceleration history for both Axial and Lateral acceleration separately.
The plots are shown on the action screen and can be made visible (toggle visibility) instead of the car image on the action screen by simply touching it.
Another feature available in the "Pro" version is plotting of recent acceleration, where you can see about a half minute of the recent acceleration history for both Axial and Lateral acceleration separately.
The plots are shown on the action screen and can be made visible (toggle visibility) instead of the car image on the action screen by simply touching it.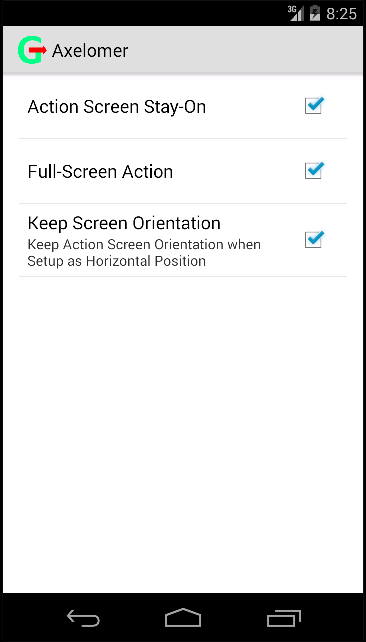 The following are the application options that you can change:
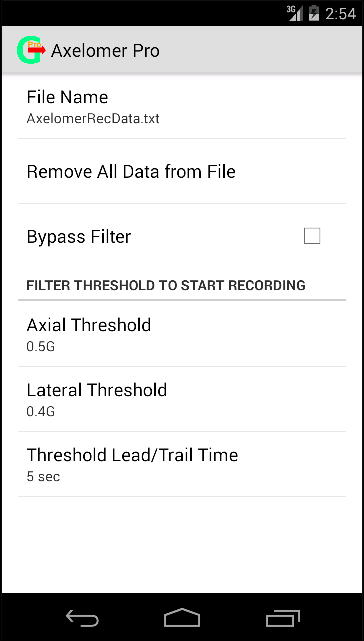 This screen/view has the following options:
For example if you set filter to trigger at 0.5g lateral, with 4 seconds lead/trail time, then the recording will start 4 seconds before you reach lateral acceleration of 0.5g (say while cornering), then it will keep recording while your lateral acceleration is at least 0.5g, and keep recording for 4 more seconds when the acceleration drops below the threshold. Recall however that in order to record anything with or without filter you have to start recording on the action screen/view, and the recording will be forced to stop when you quit the action screen/view mode.
 In order to activate the recorder, press the
⇚ "Start Recording" button on the Action screen/view (shown on the picture to the left).
Then the start button will start blinking to indicate that the recording is active.
Press this button again to deactivate the data recording.
Note, that the recording will occur only when the recorder is activated and the recording filter conditions are met (or filter bypass is chosen in the options).
The rate of recording is fairly high at about 10 times per second, which is necessary to capture the dynamics of your driving.
Consequently it increases the size of the data file fast, so choosing to bypass filter and record continuously may easily overfill the storage space.
Thus it is recommended not to bypass filter, and set reasonably high recording trigger thresholds, so that only meaningful data is recorded:
obviously there is no reason to record close to zero acceleration data points while the car is moving with a constant speed along a straight line.
You can clean the data from the file by pressing a "Clear Data" button from "Data Recording Options" menu.
If you change the name of the data file in "Data Recording Options" then the old file will remain and the new file will be created if not already exists.